Phone Setup
How to Move a Travel eSIM to a New iPhone Before You Fly
Use this esim transfer to new iphone travel guide to move carrier lines, protect travel data plans, and avoid QR code mistakes.
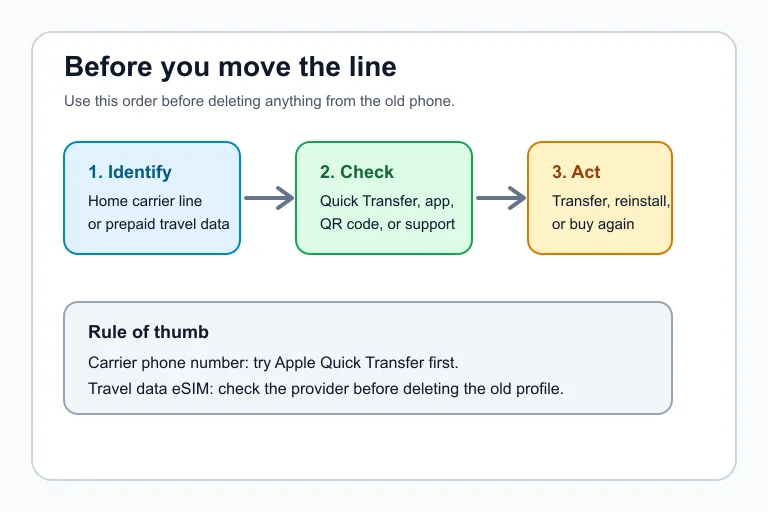
Planning an esim transfer to new iphone travel switch is mostly about knowing which line can move and which travel plan needs a fresh install. Do that before you wipe the old phone, and you avoid the worst airport problem: a new iPhone with no working data and no easy way to receive verification codes.
Here is the practical split. Your regular carrier line may transfer through Apple’s eSIM Quick Transfer if your carrier supports it. A prepaid travel eSIM, though, is often tied to the first device where it was installed, so you may need the provider app, support reissue, or a new plan.
| What you see | Likely cause | First move |
|---|---|---|
| The old carrier line appears on the new iPhone | Your carrier supports Quick Transfer | Keep both phones nearby and follow the prompt |
| No travel eSIM appears during setup | Marketplace eSIMs rarely move through Apple setup | Open the provider app before deleting the old profile |
| The QR code says it was already used | The travel eSIM allows one install only | Ask support for reissue or buy a replacement |
| The line installs but has no data abroad | Data roaming, APN, or network selection is wrong | Check the provider’s activation instructions |
| You cannot receive SMS codes | Your primary number was not moved first | Transfer your home line before the travel data plan |
What You Need
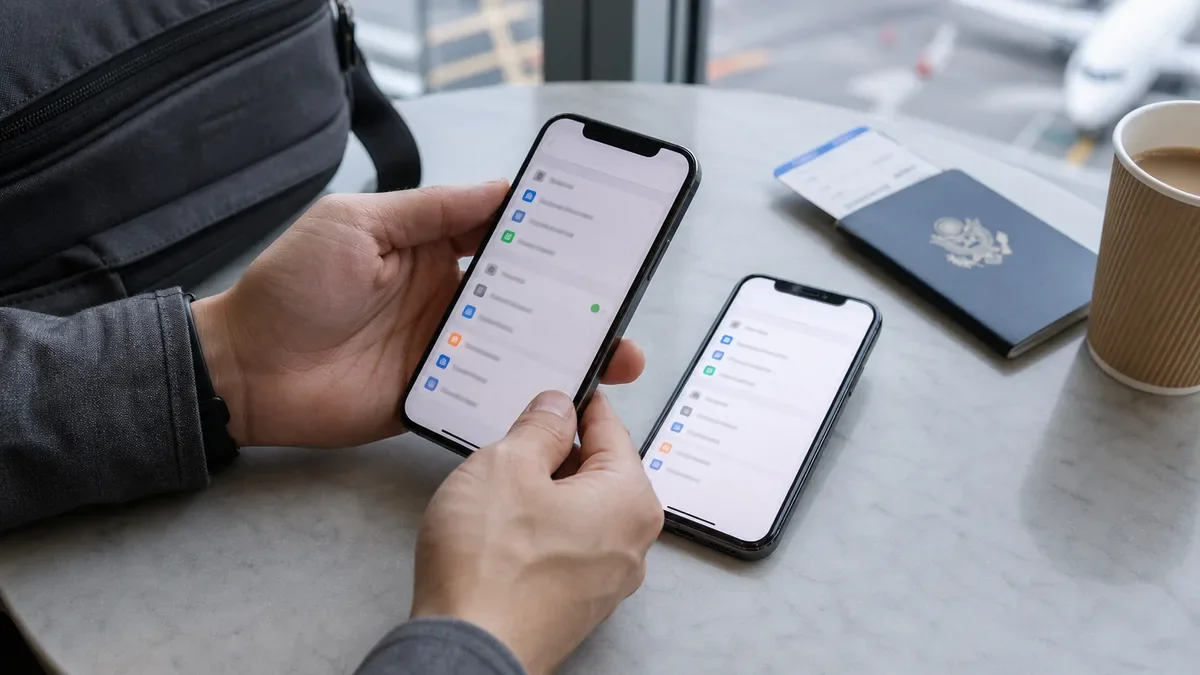
- Both iPhones charged and within Bluetooth range.
- Wi-Fi on the new iPhone, or a reliable hotspot.
- Your Apple Account signed in on both devices.
- The old iPhone passcode and any carrier account PIN.
- The travel eSIM app, QR code email, order number, and support contact.
- Enough time before departure, ideally 20 to 30 minutes without rushing.
eSIM transfer to new iPhone travel: decide what can actually move
Estimated time: 5 minutes
- Open Settings on the old iPhone. Go to Cellular and write down each line label, such as Primary, Business, France data, or Europe travel.
- Separate phone-number lines from data-only plans. Your home number handles calls, SMS, banking codes, and account recovery. Your travel eSIM usually handles data only. If you are unsure how this affects calling and texting, read Data-Only eSIM or Phone Number: Which Should You Buy? before you touch the old phone.
- Check whether the travel plan was already installed. If it was installed and activated on the old iPhone, assume it may not transfer unless the provider says so.
- Find the provider’s rule. Some carrier eSIMs can transfer. Some travel marketplace eSIMs must be reissued, and some must be purchased again.
Honestly, this is where people usually get it wrong. They treat every eSIM like the same thing, then discover that a vacation data plan behaves very differently from a monthly carrier line.
Move your regular carrier line first
Estimated time: 10 minutes
- Start with the new iPhone setup flow. If the phone asks whether to transfer your cellular plan, choose the plan tied to your main number and follow the prompts on both devices.
- If setup is already finished, use Settings. On the new iPhone, open Settings, tap Cellular, then Add eSIM or Set Up Cellular. If your carrier supports it, choose the line from the nearby iPhone.
- Approve the transfer on the old iPhone. Keep the old phone unlocked. Enter any code shown on the new iPhone if Apple or the carrier asks for it.
- Wait for activation to finish. Once the new line activates, the old SIM or eSIM may deactivate. Test a call, a text, and mobile data before moving on.
Apple’s support page says Quick Transfer depends on carrier support, and that the old SIM is deactivated after the plan activates on the new iPhone. That matters because you do not want to be halfway through a transfer while also trying to board a flight.
Handle the travel eSIM without losing the plan
Estimated time: 10 to 20 minutes
- Open the travel eSIM provider app or order email. Look for language like “one-time install,” “cannot be transferred,” “reinstall,” or “replacement eSIM.”
- Do not rescan the old QR code blindly. A QR code can look reusable even when the provider has already marked it as consumed.
- If the provider allows reinstall, install on Wi-Fi. Follow the app instructions on the new iPhone, then keep the old phone untouched until the new line appears under Cellular.
- If the provider does not allow transfer, contact support before buying again. Give them the order ID, destination, ICCID if visible, and explain that you replaced your iPhone before the trip.
- If departure is close, buy a replacement plan. The cheapest fix is not always the best fix when you need maps, ride apps, and hotel messages after landing.
Airalo, for example, says its eSIM can only be installed on one device and cannot be transferred after installation. That does not mean every provider follows the exact same policy, but it is a strong warning to check before you delete anything.
Install and test the new travel data line
Estimated time: 10 minutes
- Connect the new iPhone to Wi-Fi. Many eSIM installs need internet access before the travel line can work.
- Add the eSIM through the provider’s preferred method. Use the app, QR code, carrier link, or manual details. Avoid switching between methods unless support tells you to.
- Label the line clearly. Use a destination label such as Spain Data, Bali Data, or Europe Trip so you do not confuse it with your home number.
- Set cellular data to the travel line only when ready. Before you leave, you can keep your home line active for calls and texts while the travel line waits for destination coverage.
- Check data roaming instructions. Travel eSIM providers often require data roaming on for that specific line. Your home line should stay controlled so it does not create roaming charges.
Going to Europe? Check destination details instead of assuming one regional plan fits every trip. We keep separate setup and coverage notes for Spain travel eSIMs, France travel eSIMs, and Italy travel eSIMs because trains, islands, rural routes, and hotspot rules can change the smarter choice.
Plan for the trip you are actually taking
Estimated time: 5 to 15 minutes
- Match the plan to your route. A city break, road trip, island stay, cruise, and multi-country work trip do not use data the same way.
- Check hotspot rules before you depend on tethering. Some “unlimited-style” travel plans are not ideal for laptop work.
- Keep the provider app installed after activation. You may need it for top-ups, APN notes, network selection, or support chat.
- Save offline proof. Screenshot your order, QR code page if allowed, ICCID, activation notes, and support thread.
For route-specific planning, compare our guides to Bali eSIM setup, Iceland Ring Road coverage planning, Thailand travel eSIM picks, Turkey eSIM setup, Mexico roaming alternatives, and USA tourist eSIM options. Cruise travelers should also read our cruise eSIM guide, because ship days and port days are a different problem.
Fix the common activation problems
Estimated time: 5 to 15 minutes
- Toggle Airplane Mode. Give the phone a minute to reconnect before changing more settings.
- Confirm the travel line is turned on. Go to Settings, Cellular, then tap the line and check whether it is enabled.
- Set Cellular Data to the travel eSIM. If your home line is still selected, the travel plan may be installed but unused.
- Enable data roaming only on the travel line if required. Many travel eSIMs need this, while your home line may not.
- Restart the iPhone. It sounds basic, but it often forces a fresh network registration.
- Contact provider support with details. Send screenshots, the destination, current network, APN if listed, and the exact error message.
If your issue is broader than moving phones, use our iPhone eSIM activation fixes before deleting the profile. For setup from scratch, the cleaner pre-flight walkthrough is how to set up a travel eSIM on iPhone before you fly. If you will be away from Wi-Fi, read what still works without Wi-Fi first.
Compare providers if you need to rebuy
Estimated time: 10 minutes
- Price the replacement against your real data needs. A cheap 1 GB plan can become expensive if you need maps, video calls, and rideshare apps all week.
- Check fixed data versus unlimited-style data. Unlimited-style plans may slow after fair-use thresholds, while fixed plans are clearer but less forgiving.
- Look at support access. When a phone swap goes badly, fast chat support beats a low price with slow replies.
- Check whether top-ups attach to the same eSIM. If the provider allows top-ups, you may not need a full replacement later.
For side-by-side shopping, start with Nomad vs Airalo and Holafly vs Airalo. If price is the main pressure, compare cheap Europe eSIM trip costs, eSIM vs roaming cost math, and Europe travel eSIM plans. Longer work trips should also consider backup data for digital nomads.
Quick Checklist
- Move your primary carrier number before the travel data plan.
- Keep both iPhones nearby, unlocked, charged, and on Bluetooth.
- Check the travel provider’s transfer or reinstall policy before deleting anything.
- Install the replacement eSIM on Wi-Fi before you leave for the airport.
- Label each line clearly in Settings, Cellular.
- Test calls, SMS, and mobile data after the move.
- Save provider support details and order screenshots offline.
Official sources: Apple Support: Set up eSIM on iPhone · Airalo Help: Can I transfer my eSIM to a new device?.
A smooth phone upgrade comes down to order. Move the line that proves your identity first, then deal with the travel eSIM as a separate product with its own rules. Once the new iPhone can call, text, and use data, your trip setup is in a much better place.
Frequently Asked Questions
can i transfer a travel esim to a new iphone?
Sometimes, but do not assume it. A home carrier eSIM may move through Apple’s transfer flow if the carrier supports it. A prepaid travel eSIM is often single-install, so check the provider app or help page before deleting the old profile.
what happens if i delete my travel esim before transferring?
You may lose access to that profile. Some providers can reissue an eSIM, while others treat the installed profile as used and require a new purchase. Contact support with your order number before you wipe the old phone.
do i need wifi to transfer esim to new iphone?
Plan on having Wi-Fi. Apple’s setup flow, carrier activation, provider apps, QR code installs, and support chats all work better with a stable internet connection. Do the move before you leave home or while you still have reliable hotel Wi-Fi.
why does my esim qr code say already used?
The provider probably marked that QR code as consumed after the first install. Do not keep retrying it. Open a support chat, ask whether the plan can be reissued, and be ready to buy a replacement if your flight is close.
should i transfer my main number or travel esim first?
Transfer your main number first. That line usually receives bank codes, carrier verification messages, and account recovery texts. Once it works on the new iPhone, you have a safer way to fix the travel data line.